Skip to content

Summary Highlights
| Wondering how to install kitchen cabinets? This step-by-step DIY guide covers everything from marking wall studs and leveling base cabinets to drilling pilot holes, using a laser for alignment, and securing cleats. Learn how to install upper wall cabinets, attach drawer slides, and add crown molding for a polished finish. Whether you’re replacing cabinetry near the sink or stove or wondering how hard it is to install kitchen cabinets yourself, this guide helps you handle drywall, lumber, and hardware like a pro. Ideal for kitchen renovation and home improvement projects. |
Installing kitchen cabinets might seem overwhelming at first, but with careful planning, the right tools, and a methodical approach, it’s entirely achievable as a DIY project. Whether you’re doing a full kitchen renovation or simply updating your space, learning how to install kitchen cabinet units correctly will save you time and money—and leave you with results you’ll be proud of.
This guide walks you through every step of installing kitchen cabinets—from preparation to finishing touches—so you can complete the job with confidence and precision.
Why Proper Cabinet Installation Matters
A proper kitchen cabinet installation ensures not only a beautiful finish but also long-term durability and practicality. Skipping steps or rushing through the process can lead to sagging cabinets, misaligned doors, and wasted space.

Long-Term Durability & Performance
When you install kitchen cabinets correctly, you enhance their structural integrity and stability. Cabinets that are level and properly anchored will withstand years of use without sagging, warping, or pulling away from the wall.
Cabinet Alignment and Functionality
Even small misalignments can affect how your cabinet doors close or how drawers glide. Installing kitchen cabinets with precision ensures everything functions smoothly and looks seamless. Take the time to measure and adjust, and your cabinets will work perfectly for years to come and be the perfect investment for your kitchen renovation plans.
Maximizing Space and Storage Efficiency
Proper layout and alignment mean you’re using your kitchen’s square footage efficiently. When you understand how to install kitchen units, you avoid wasted space and create an organized, clutter-free environment. Don’t underestimate the impact of well-installed cabinets on your kitchen’s functionality!
Tools and Materials Needed
Before you start installing your kitchen cabinets, you’ll need the right tools and materials. Let’s go over what you’ll need to get the job done efficiently.
Basic Tools (Drill, Level, Stud Finder)
You’ll need these essentials to guarantee success:
- Power drill with appropriate bits
- Level (preferably 4 feet or longer)
- Stud finder
- Tape measure
- Screwdrivers
- Pencil and masking tape
Specialty Tools for Accuracy
While basic tools are essential for installing kitchen cabinets, specialty tools can enhance precision and guarantee a professional finish. Consider using:
- Cabinet jack or helper supports
- Laser level for accuracy
- Kreg jig for pocket-hole joinery
- Clamps
- Shims for leveling base cabinets
Safety Gear and Prep Materials
To guarantee a safe and efficient kitchen cabinet installation, it is crucial to gather the right safety gear and prep materials:
- Safety goggles
- Work gloves
- Dust mask
- Drop cloths to protect the flooring
- Wood screws and anchors
Pre-Installation Preparation
Before you start installing your kitchen cabinets, you’ll need to prepare the space properly:
Measure the Kitchen Space
You don’t want to end up with cabinets that don’t fit! To avoid this, make certain to: .
- Measure the height, width, and depth of your kitchen space.
- Note any obstructions, such as windows and doors.
- Double-check your measurements to guarantee accuracy.
Plan the Cabinet Layout
Sketch a detailed layout of upper and base cabinets. Most base cabinets are 24″ deep and 34.5″ tall (without countertop). Wall cabinets are generally 12″ deep and mounted 18″ above the countertop. Visualize your design on paper or use design software, ensuring you account for appliances, doors, and windows.
Mark Studs and Layout Lines
With your cabinet layout planned, the next step is to mark the studs and layout lines on your walls. This guarantees a sturdy installation. Here’s what you’ll need to do:
- Use a stud finder to locate the studs.
- Mark the stud positions with a pencil.
- Draw level layout lines for your cabinets.
Remove Old Cabinets (If Applicable)
Start by turning off the power to the electrical outlets and removing the hardware. Next, detach the cabinets from the wall, using a pry bar if necessary. Be careful not to damage surrounding walls or countertops, and dispose of the old cabinets responsibly.
Ensure Wall Level and Flatness
A solid foundation makes a world of difference in your kitchen’s aesthetics and functionality. Here’s what you need to do:
- Use a level to check for evenness.
- Measure for any dips or bumps.
- Fill in imperfections with appropriate materials.
Step-by-Step Guide to Installing Kitchen Cabinets
Now that you’re ready to learn how to install your kitchen cabinets, let’s break it down step-by-step and bring your kitchen renovations to life:
Step 1 – Install the Upper Wall Cabinets First
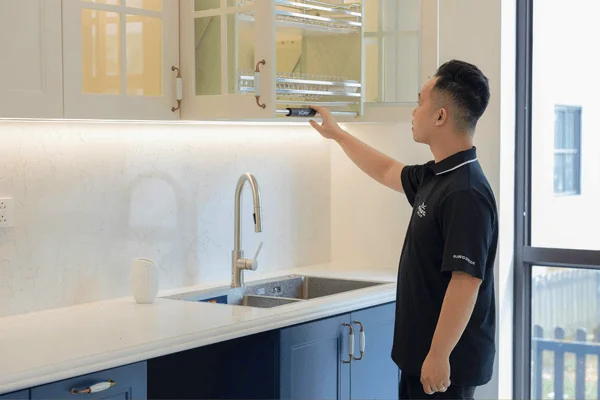
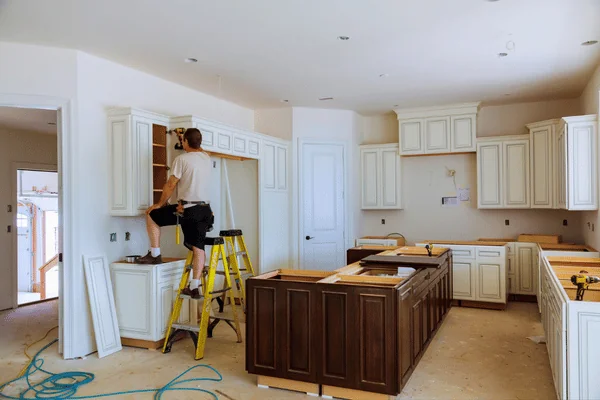
Begin with the upper cabinets so you don’t work over the base units later. Use a ledger board (screwed into the wall) to support the cabinets while you screw them in temporarily.
- Begin in a corner and work outward.
- Lift cabinets into place (with help or a cabinet jack).
- Drill screws into wall studs through the cabinet backs.
- Use a level frequently to ensure alignment.
Step 2 – Secure Base Cabinets to the Floor and Wall
- Set the first base cabinet in place against the wall.
- Use shims to ensure the surface is level both front-to-back and side-to-side, and secure them in place as needed.
- Drill through the back rail into the wall studs.
- Attach adjacent cabinets using screws through their side panels.
Step 3 – Shim and Level for Perfect Alignment
Shimming base cabinets is essential for achieving a level work surface.
- Use wood or plastic shims beneath or behind cabinets as needed.
- Continuously check with a level.
- Adjust until the top is even and ready for countertop installation.
Step 4 – Attach Face Frames and Adjust Hinges
After all the cabinets are in place:
- Screw face frames together tightly and clamp while drilling.
- Check hinge alignment and adjust for even spacing and smooth door operation.
Step 5 – Add Fillers, Trim, and Toe Kicks
Finish your kitchen cabinet installation with detailed work:
- Fillers: Fill any gaps between cabinets and walls.
- Trim: Add crown molding or side trim for a built-in look.
- Toe kicks: Attach to the base of lower cabinets for a clean, finished look.
Common Mistakes to Avoid
When learning how to install kitchen cabinets, it’s easy to make a few common mistakes that can lead to frustration and create problems for your kitchen renovation. Here are a few you should avoid:
Uneven Mounting and Gaps
Even if you’ve carefully measured your space, uneven mounting and gaps can still sneak in during your cabinet installation. These issues can ruin your hard work and lead to frustration. Always use a level and check alignment after each step.
Over-tightening Screws
While you might think that tightening screws as much as possible guarantees a secure fit, over-tightening can cause more harm than good. It can strip the screw holes, crack your cabinets, or misalign the structure. Instead, aim for a snug fit without excessive force.
Not Using Studs for Anchoring
One common mistake many make during kitchen cabinet installation is neglecting to use studs for anchoring. To ensure your cabinets stay secure, remember always to anchor them to wall studs. Drywall alone won’t support their weight.
When to Hire a Custom Kitchen Cabinet Maker
Not every kitchen project is a DIY job—here’s when it makes sense to bring in a cabinet maker.
Complex Layouts and Unique Kitchen Designs

If your kitchen has unique angles or non-standard dimensions, a custom kitchen cabinet maker can design units that fit perfectly without awkward gaps.
High-End Materials or Finishes
Expensive woods, glossy finishes, or European-style frameless cabinets require expert craftsmanship to avoid damage during kitchen cabinet installation.
Time Constraints and Precision Requirements
Installing kitchen cabinets is a time-consuming process that requires precision and accuracy. If you’re on a tight timeline or unsure of your skills, calling a local kitchen cabinet contractor ensures a polished result.
Final Touches and Finishing Tips
Learning how to install kitchen cabinet units is a rewarding way to upgrade your home. With the right tools, careful measurements, and a solid plan, even a DIYer can achieve professional-looking results. As you finish up, don’t skip the final touches—caulk any small gaps, install hardware like handles and knobs, and clean all surfaces before use. Reinstall or update lighting if needed to complete the space. Whether you tackled it yourself or brought in a professional, you’ve created a more functional and visually appealing kitchen.
Contact a custom kitchen cabinet maker for expert help or request a free kitchen renovation and installation quote today!
Frequently Asked Questions
What type of cabinets is best for kitchen durability?
For long-lasting durability, opt for cabinets made from plywood or solid hardwood. These materials are stronger and more resistant to warping and daily wear than particleboard. High-quality finishes also matter—look for moisture-resistant coatings that can handle steam and splashes. If you prefer a modern style, metal cabinets are another durable, easy-to-clean option. Regardless of the type you choose, sturdy hinges and drawer slides are just as important as the cabinet box itself.
Can I paint or stain cabinets after installation?
Yes, you can paint or stain your cabinets after they have been installed. Ensure the surfaces are clean and dry before beginning. Lightly sand the cabinets to improve adhesion, then tape off edges to protect walls and counters. For painting, apply a primer followed by two thin coats of paint. For staining, apply evenly with a brush or cloth, then wipe away the excess. Allow everything to dry completely before using it regularly.
What should I do if I encounter plumbing issues during installation?
If you discover plumbing issues during installation, turn off the water supply immediately to prevent damage. Inspect the area for leaks or loose connections. Sometimes, you may need to remove a cabinet to access the plumbing more easily temporarily. If rerouting pipes or working near gas lines, it’s best to consult a licensed plumber to avoid costly mistakes or safety hazards.
Are there specific maintenance tips for newly installed kitchen cabinets?
Routine care can keep your cabinets looking great for years. Wipe surfaces weekly with a soft, damp cloth to remove dust and spills. Avoid using abrasive cleaners or harsh chemicals that could damage the finish. Tighten loose hinges or knobs as needed, and use felt pads under countertop appliances to prevent scratches. Keeping cabinets dry—especially around sinks—helps preserve both structure and appearance.
How long does it take to install kitchen cabinets?
Installation time varies depending on your layout and experience. For most kitchens, the process takes between one and three days. Simple, straightforward layouts go faster, especially if you’re using pre-assembled units. Custom cabinetry or complex designs may take longer and require more precision.
Can one person install kitchen cabinets alone?
It’s possible, particularly for upper or lightweight cabinets, but having the right tools is key. A cabinet jack or temporary support board can help you hold units in place while you secure them. For larger or heavier cabinets, a second person makes the job easier and reduces the risk of mistakes or injury.