Skip to content
If you’ve ever looked at your kitchen and thought, I could build that cabinet myself, you’re not alone. So, to answer: ‘How do I build a kitchen cabinet?’, you have to know that it isn’t as complicated as it seems — with the right plan, tools, and patience, you can create beautiful, custom kitchen cabinets that fits your space perfectly.
Whether you’re improving your kitchen on a budget or simply enjoy hands-on projects, this guide will walk you through every step — from design and materials to construction and finishing touches.
Ready to build kitchen cabinet setups that fit your style and space? Our local kitchen remodeling pros design and install custom cabinets for kitchens that enhance functionality, beauty, and storage—creating a perfect blend of craftsmanship and modern design for your dream kitchen. Let’s take a closer look now!
Planning Your Kitchen Cabinet Build
Before diving into any cuts or assembly, start with a solid plan. A clear design and accurate measurements are the foundation of any successful DIY kitchen cabinet project.

Measure Your Space Accurately
The first step in successfully DIYing a kitchen cabinet is precise measurement. Determine the height, width, and depth of your designated space. Account for appliances, wall irregularities, or trim that may affect installation. Taking the time to measure carefully now prevents major frustrations later.
Choose Between Framed and Frameless Designs
Your cabinet’s structure will define both its look and function:
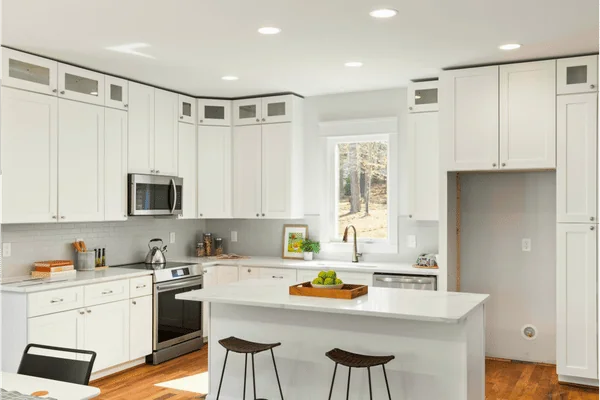
- Framed cabinets: Traditional, sturdy, and ideal for a classic kitchen style.
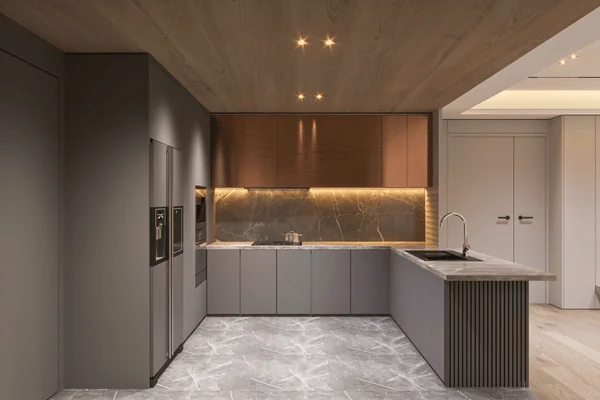
- Frameless cabinets: Sleek, modern, and easier to access inside.
If you’re unsure which option suits your space, consult a kitchen cabinet maker for professional insight on style, functionality, and long-term durability.
Select the Right Materials
Once you’ve chosen your structure, pick materials that fit your budget and needs:
- Solid wood: Offers unmatched strength and a natural finish.
- Plywood: Durable and cost-effective — a favorite among DIYers.
- MDF: Smooth and affordable, great for painted finishes.
The right choice balances aesthetics, performance, and affordability.
How to DIY a Kitchen Cabinet -Tools and Materials You’ll Need
Before you start building, gather all the necessary tools and supplies. Preparation makes a big difference when figuring out how do I build a kitchen cabinet efficiently.
Some Essential Tools
Having the right tools is crucial for a successful kitchen cabinet build:
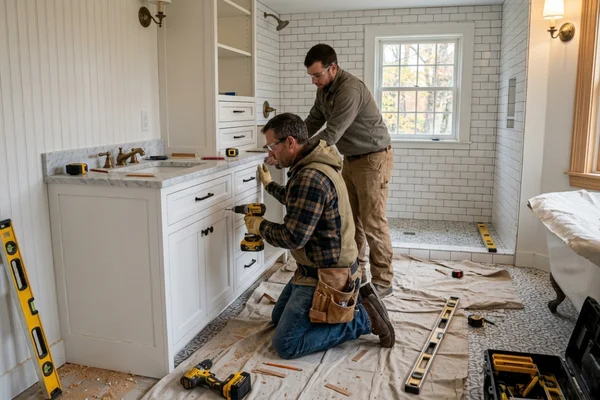
- Measuring tape, level, square, and clamps.
- Saw (circular or table), drill, and screws.
- Wood glue and safety gear.
Key Materials
Making a long-lasting kitchen cabinet requires careful material selection:
- Plywood or solid wood for panels.
- Hinges, handles, and drawer slides.
- Paint, stain, or sealant for finishing.
Keeping everything ready before cutting saves time and keeps your workspace organized.
Step-by-Step Guide: How Do I Build a Kitchen Cabinet?
Now for the hands-on part. Follow these clear steps to assemble your own cabinet like a pro.

Step 1 – Cut and Prepare the Panels
Measure twice, cut once. Mark your dimensions on plywood or wood boards using a square for precision. Cut the sides, top, bottom, and back panel, and sand the edges smooth. Label each piece so assembly runs smoothly.
Step 2 – Assemble the Box Frame
Join the sides, top, and bottom panels using wood glue and screws. Clamp them in place and check alignment with a carpenter’s square. Once the structure is solid, attach the back panel.
Pro tip: Always pre-drill screw holes to prevent splitting and ensure a clean, professional finish.
Step 3 – Build and Install the Shelves
Decide between fixed or adjustable shelves for your kitchen cabinet installation. Fixed shelves provide sturdy support for heavy kitchenware, while adjustable ones offer flexibility for changing storage needs. Use brackets or dowels for support, and ensure shelves are evenly spaced.
Step 4 – Craft the Cabinet Doors
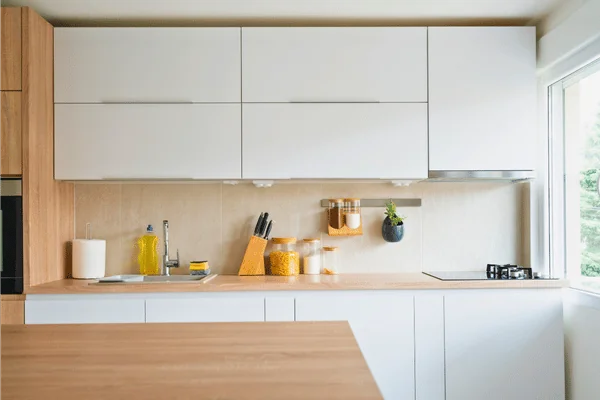
Cabinet doors are your design’s focal point. Choose between panel doors for a timeless look or slab doors for a minimalist style. Sand edges thoroughly and make sure doors fit evenly within the frame. Install hinges carefully, checking alignment before tightening screws.
Step 5 – Sand, Paint, or Stain
Finishing makes all the difference. Start with a medium-grit sandpaper, then move to fine grit for smoothness. Apply primer if painting, or a wood conditioner if staining. Finish with two or three coats of paint, stain, or sealant for durability and style.
DIY Kitchen Cabinet vs. Hiring a Kitchen Cabinet Maker
Before committing fully to your DIY build, weigh the pros and cons of doing it yourself versus hiring an expert maker.
The Case for DIY
Building your own cabinet can save a significant amount of money and give you complete creative control. You can customize dimensions, finishes, and features without paying for professional labor. For those who enjoy hands-on projects, this can be both a rewarding and budget-friendly option.
The Case for a Professional Cabinet Maker
Hiring an experienced cabinet maker guarantees professional results, higher-quality materials, and precise craftsmanship. Professionals can handle complex designs, ensure structural stability, and deliver a flawless finish that might be difficult for beginners to achieve.
When to DIY and When to Hire
If you have basic carpentry skills and plenty of time, a DIY kitchen cabinet project is a great choice. However, if your project involves built-ins, intricate detailing, or major kitchen remodeling, a professional ensures the best outcome — saving time and potential rework costs.
Tips and Mistakes to Avoid When Building a Kitchen Cabinet
Even experienced DIYers can run into challenges, but a few smart strategies can make your cabinet project easier and more rewarding. Here are some essential tips — and the common mistakes you’ll want to avoid.
Top Tips for a Smooth Build
- Plan in advance: Design your layout and double-check measurements before making any cuts.
- Use quality materials: Don’t compromise on wood grade, hinges, or hardware — they affect both durability and appearance.
- Keep your workspace organized: A clean, well-lit area reduces errors and speeds up assembly.
- Pre-drill screw holes: This prevents splitting and ensures joints fit tightly.
- Take your time: Rushing leads to uneven cuts or misalignment—slow, steady progress results in a polished, professional finish.
Common Mistakes to Avoid
- Using the wrong wood type: Hardwoods are durable but heavy; plywood offers stability and versatility. Avoid low-grade MDF, especially in humid kitchens.
- Skipping sanding or finishing: Unfinished surfaces absorb moisture and stain unevenly. Always sand thoroughly and apply paint or sealant to protect the wood.
- Ignoring uneven walls or floors: Use shims or adjustable legs to level your cabinet during installation. For tricky fits, a cabinet maker can help ensure a flawless result.
- Rushing assembly: Taking extra time to check squareness and alignment will make your cabinet sturdier and more attractive in the long run.
Final Thoughts – Build a Kitchen Cabinet
If you’ve wondered, ‘How do I build a kitchen cabinet that looks professional?’, the answer lies in preparation, precision, and patience. With the right materials, careful measurements, and a thoughtful approach, you can create a cabinet that’s both functional and beautiful.
Building a kitchen cabinet yourself can be deeply rewarding, but don’t hesitate to seek help for more complex designs or finishes. Let our local kitchen remodeling pros help you build kitchen cabinet setups that reflect your taste and lifestyle. From concept to completion, we create custom cabinets for kitchens that maximize space, add elegance, and bring your kitchen vision to life.
Ready to upgrade your space with custom cabinets? Whether you want to DIY kitchen cabinets or hire a skilled kitchen cabinet maker, we’re here to help. Contact us today for expert cabinet design and installation!
Frequently Asked Questions
1. What tools do I need to build a kitchen cabinet?
The essential tools include a circular saw or table saw for cutting panels, a drill and screwdriver set for assembly, and a level for alignment. Add clamps to hold pieces steady, a measuring tape for accuracy, and sandpaper or a sander for finishing touches.
2. How long does it take to build a kitchen cabinet?
For a simple design, expect a day or two from cutting to finishing. Beginners might take longer to measure, assemble, and finish properly. More complex layouts or multiple cabinets may stretch to several days.
3. Can I customize cabinet sizes for my kitchen layout?
Yes. Custom sizing is one of the advantages of learning how to build a kitchen cabinet yourself. Measure your space carefully and design your cabinets to fit around appliances, corners, or awkward gaps. If you want seamless installation or a built-in look, a professional kitchen cabinet maker can help fine-tune your design.
4. How do I keep cabinet doors aligned and level?
Alignment starts with precise installation. Use adjustable hinges and check the level frequently as you mount doors. Small adjustments—up, down, or side to side—can correct most issues. If needed, add shims behind the hinges.
5. What safety tips should I follow when building cabinets?
Always wear protective gear, keep cords clear of cutting areas, and use clamps to secure panels before cutting. Read tool manuals carefully and work slowly—accuracy and patience matter more than speed.
6. Should I DIY or hire a professional cabinet maker?
It depends on your comfort level and goals. DIY saves money and lets you personalize every detail, but it requires time, precision, and the right tools. Hiring a professional kitchen cabinet maker offers expert craftsmanship, a perfect fit, and premium finishes—ideal for complex designs or time-sensitive renovations.